Sunday

Konstrundan /Open studio and "The frame" wall art


En av mina målningar som visas på ”The frame”


(Scroll down for English. )


 Just nu är vi mycket sysselsatta med att förbereda den kommande  Konstrundan till Påsk. Förra året blev Konstrundan inställd på grund av pandemin men i år har vi öppet.


Förutom att hänga över 50 av mina konstverk som är till salu har vi även hängt upp mitt nya förvärv, en 55-tums Samsung-TV som heter The Frame. Detta visar sig vara ett utmärkt sätt att visa en retrospektiv utställning av mina målningar. Det ser ut som en bakgrundsbelyst, inramat original men bilden finns i verkligheten digitalt i TV’ns minne, de många bilder ändras automatiskt var tionde minut. Den inramade TVn hänger helt platt mot väggen så att den ser verkligen ut som en tavla. 

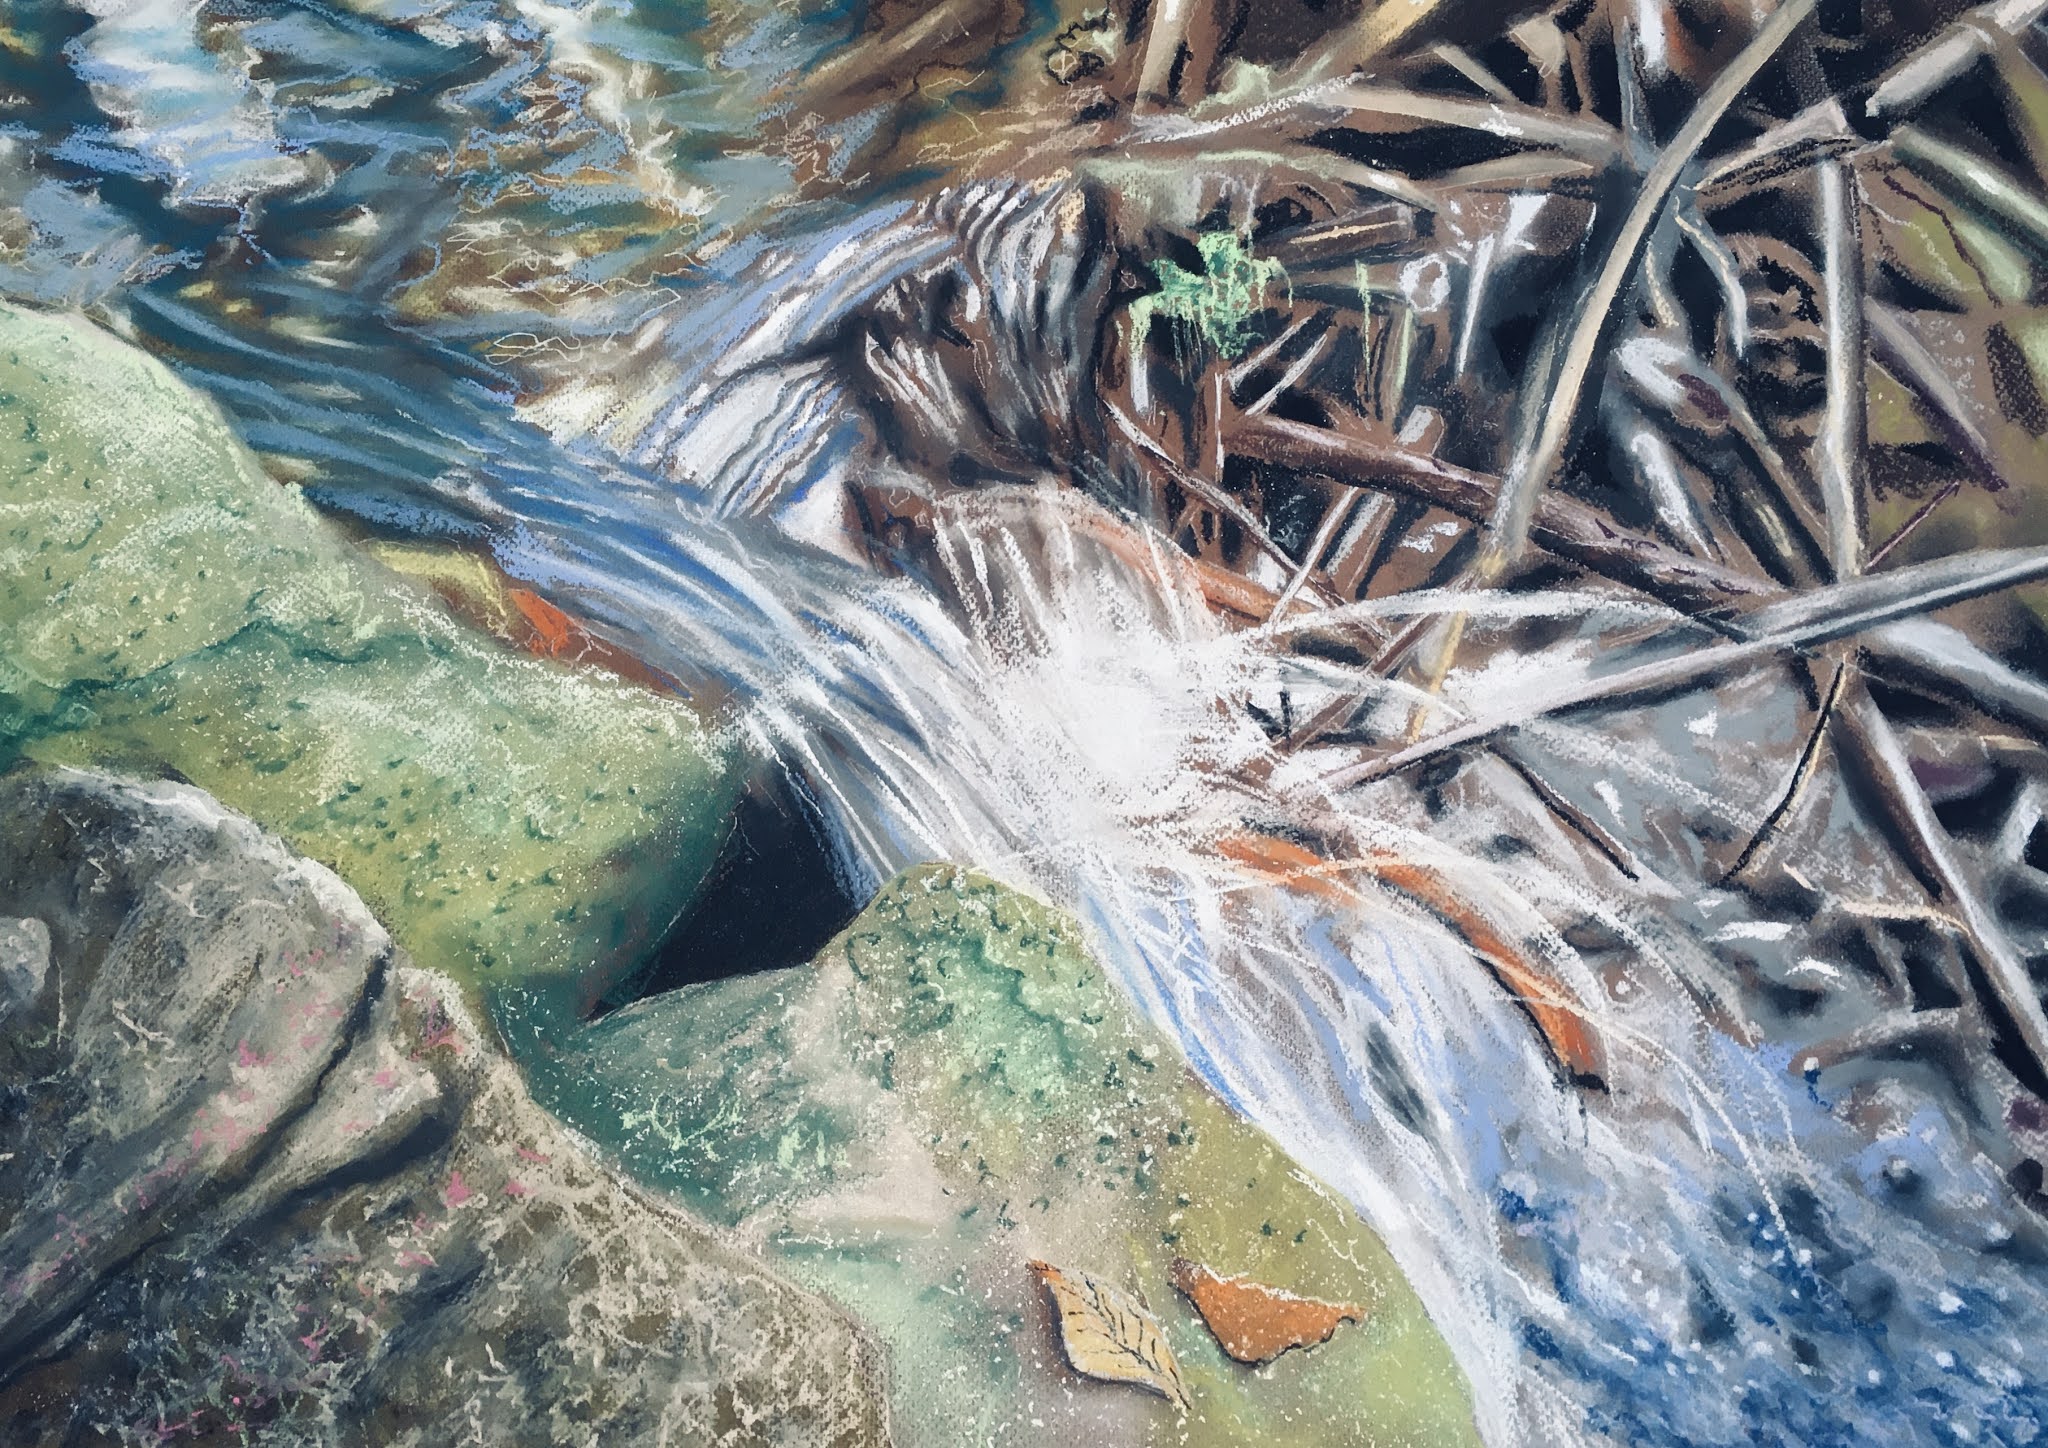
I ateljén på andra våningen kan man även se den video som jag producerade av arbetet med att måla detaljer av en bäck i skogen 


Så från 2-11 april, är ni välkomna till Konstrundan i Nordvästra Skåne där över 100 konstnärer öppnar sina hem och ateljéer för publik. Min utställning och ateljé  finns på Erikstorpsvägen 3, Borstahusen. Öppettider fredag, lördag, söndag, måndag 10-18 vardagar 16-19.
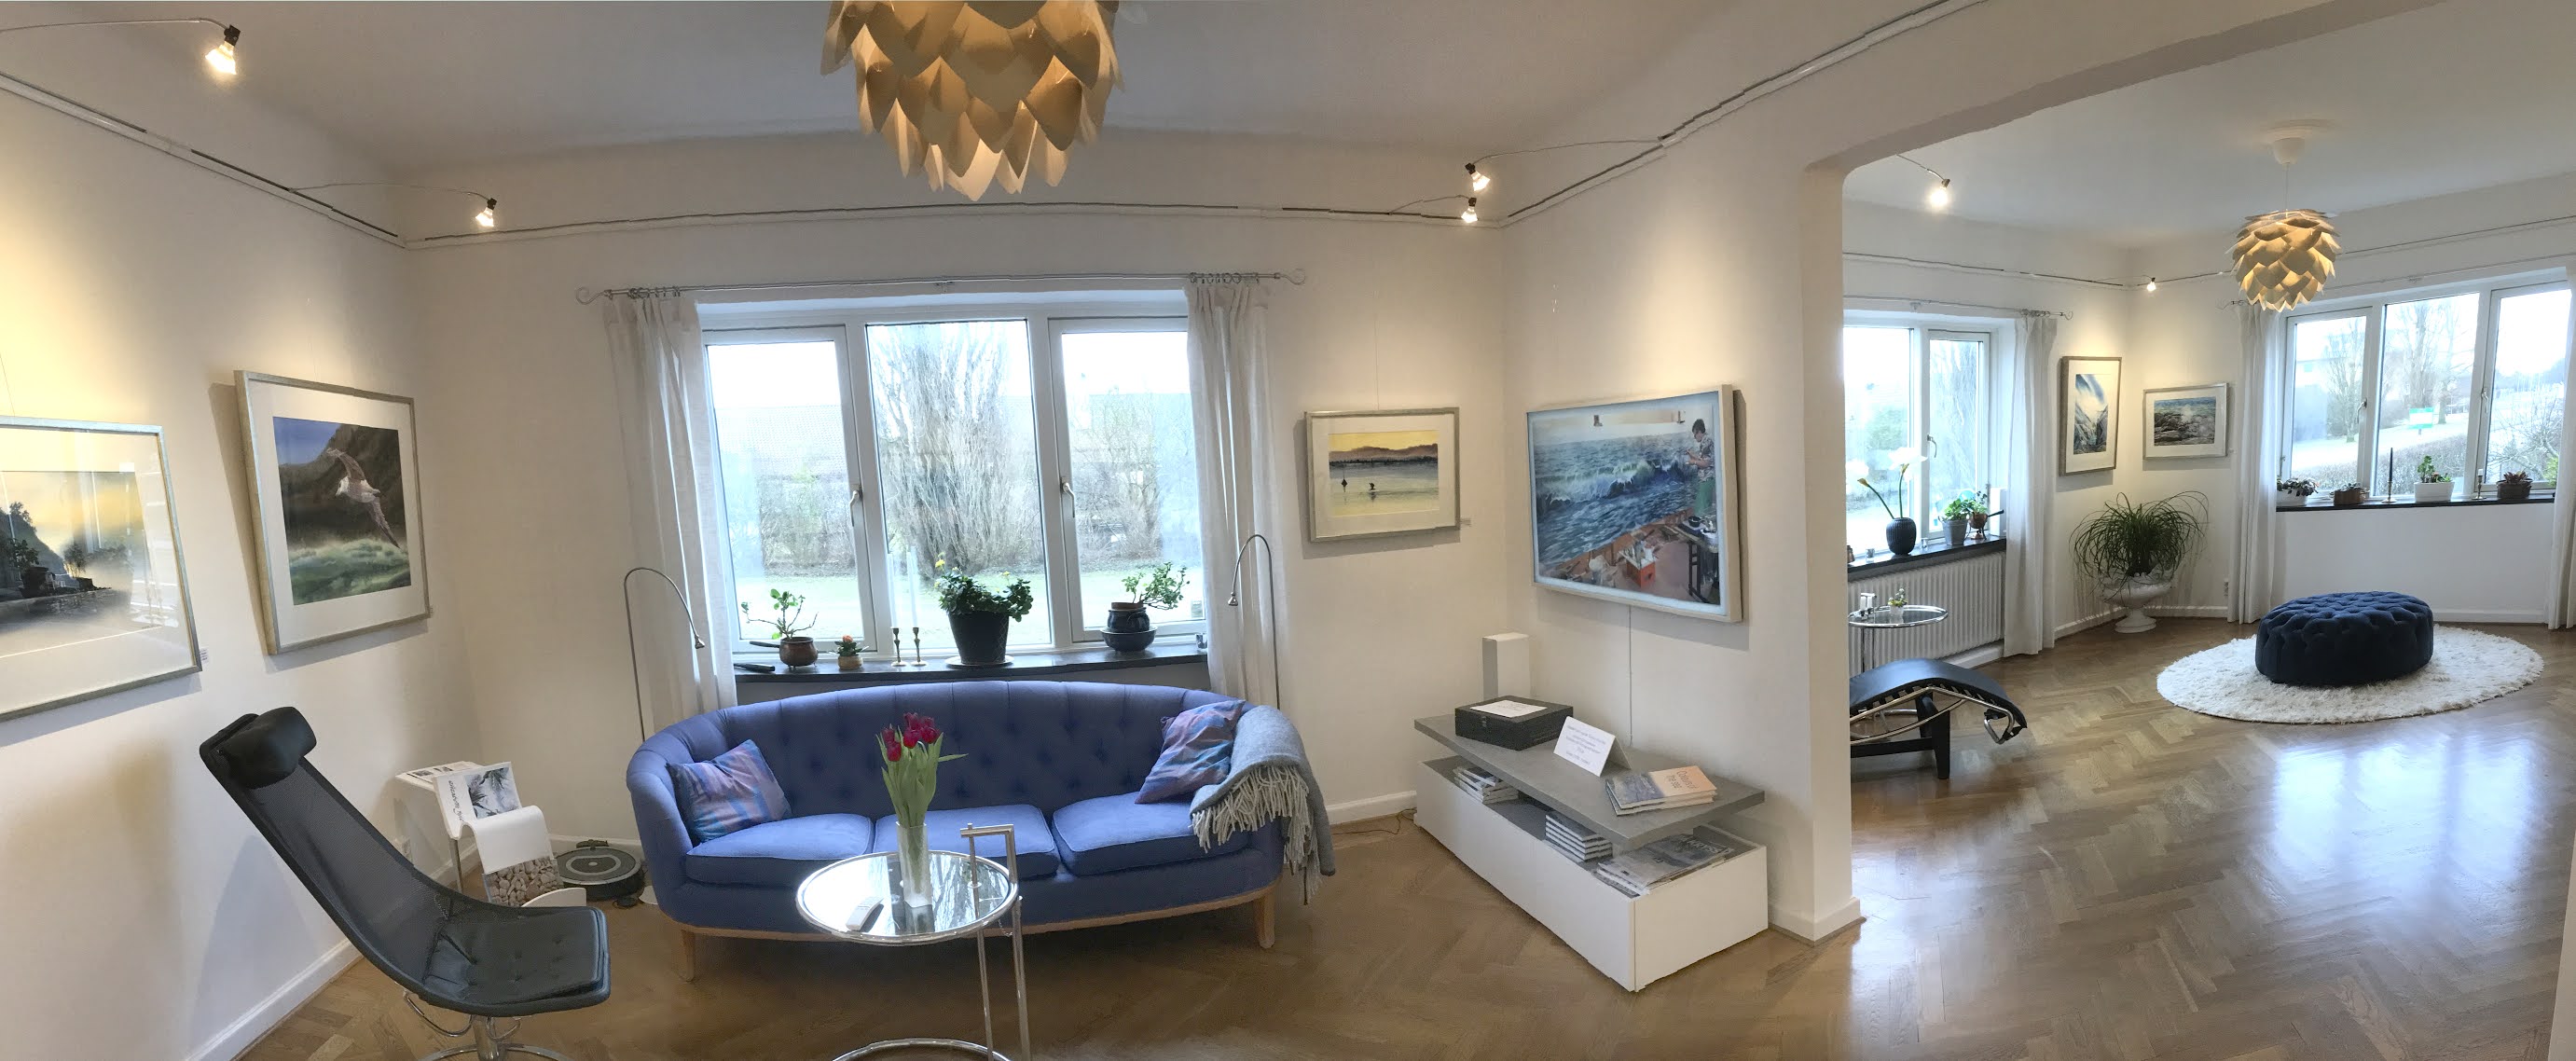

Här är en video av hur det såg ut förra året.

Öppen ateljé 


Another panorama view of the exhibition


We are now very busy preparing the upcoming open studio event "Konstrundan" for Easter. After having renovated the whole house last year in order to optimally present my artworks on two floors for the annual open studio event it was cancelled because of the pandemic. This year however the event will be open for a limited number of visitors. Apart from hanging over 50 of my artworks which are for sale we have also hung my new aquisition, a 55" Samsung TV called The Frame. This turns out to be a great way to show a retrospective exhibition of my paintings and videos. It looks like a backlighted framed original but the images are actually on the hard drive and it automatically changes the picture every 10 minutes. The Frame TV hangs completely flat against the wall so you really think it is a wall hung picture. Apart from that I will also be showing the video I produced of all the work involved painting a stream in the nearby forest.

If you happen to be in southern Sweden from 2 -11 April then you are welcome to Konstrundan where over a 100 artists open their studios. My exhibition and studio is at Erikstorpsvägen 3, Borstahusen.  Opening hours Friday, Saturday, Sunday, Monday 10-18 and weekdays 16-19.
This is a video of what it looked like last year and now there are even more paintings to see.

Open studio


Wednesday

Commission: final result


Rocky shore                                                  © Elizabeth Tyler 2021
The final result after hours of contemplating,
taking a long break, making new decisions, altering and painting again

This was what the painting looked like before the final adjustment
Close up of the dark flat stone with a surface structure of wavy patterns, dots and moss. I thought this was interesting at first but it had the effect of weighing the subject down in a negative way.
People say you can't change a watercolour once its painted but I'm stubborn and won't take no for an answer.

The same area after much of the pigment was absorbed by washing, scrubbing and dabbing with tissue. This lightened the whole area and it was then possible to add grass and reed reflected in the water. I now felt the composition was more homogeneous and harmony was restored.

Sunday

Splashing stream in pastel

The finished pastel painting  Splashing Stream  50 x 65 cm    ©Elizabeth Tyler 2021

Step 1.
Just a light sketch of the subject with a white watercolour pencil. Paper: Fabriano Tiziano Caffe.
Step 2.
Using Faber-Castell soft pastels I filled in the lightest areas of the water and
where the light catches the branches and twigs. Also the various blue and green tones were added.
Step 4.
I created some texture to the nearest stones by scraping a white pencil over the dampened surface.
Then I added more light and shadow to the twigs


Step 5
Here you can see how I worked a great deal with the rocks in the foregound,
covering the white dots with a layer of smudged green pastel.
Then I added the leaves with their own shadows to bring them into relief.
More blue in the water gave the painting some depth.


Step  6
I was still not quite satisfied with the result so I finally toned down the background with
a layer of blue. This created a contrast to the white splashing water and more harmony to the painting.

Wednesday

New experiment with pastels.


Even though I was not finished with the last watercolour I have been working on, I needed a break to try something new. I will get back to my watercolour later.

I decided to use black pastel paper (Fabriano) for this project

The choice for the new experiment and new to me material was pastel on paper. The subject is from the same area as the last watercolour featuring rocks on the beach. I worked for a while building the colours up and gradually added more tonal differences. In order to stabilise the colour I decided to spray the half finished work with fixative. This was a great mistake as the fixative I used had been standing on the shelf for years! I did shake the tin and spray in the air but it wasn´t enough to avoid this catastrophy.

Unintentional blobs and drips from the
fixative spattered on to the pastel colour

The black paper was revealed in small blemishes,
blotches, dots and specks as a result of using old fixative

Rocky Shore                                    pastel on paper  44 X 65 cm.                        Elizabeth Tyler 2021
But instead of giving up I embarked upon the tedious process of scraping the "Jackson Pollock effect" off. After this I smudged all the colours with my fingers and worked on the details of the spray, water and rocks. Then I went out and bought a new tin of fixative.

Monday

Next steps

Working on the watercolour in the studio


 The close up shots of the painting above show the work I do softening the transitions between colours. This is done with a small, wornout hake brush.
Here on the right you can see that I have also softened the reflections in the water and added detalis to the flat rocks


This shows the layers of colour added to the rock in the foreground. There is not only a difference in the colours but the direction of the brushwork describes the rocks shape and depicts different textures of the surface. 
just a few steps further working a little at a time, adding water and colour, then scraping off to reveal the texture of the paper.

Now the details of the foreground are taking shape. There are small heaps of seaweed drying in the sun and even more interesting details on the rough surface of the rocks which I am now emphasizing.
My next step will be to place tiny shadows beside all the bulges and bumps, cracks and crevasses. but that will take some time...

Commission


Via Gallery Dalström in Kungshamn I received a commission for a large watercolour painting depicting a view somewhere along the rocky coastline around Bohuslän in western Sweden. This dramatic, rugged landscape with its crystalline and metamorphic rocks has always fascinated me so I was more than pleased to accept the challenge.

My partner and I drove the 250 km northwards to find subject matter for the painting. Normally I would do some sketches directly on location “En plein air” but the weather was cold and extremely windy so I relied on taking as many photographs as possible during the daylight hours. Despite the challenging conditions I managed to take 85 photos from many directions.

sorting through the 85 photos


After studying all the shots I had taken I decided not to use one single photo but to combine some of the elements from three different ones taken in the same light. The background with sea spray added dynamic movement to the scene. A little closer were flat smooth rocks with small rock pools creating a calm contrast to the dramatic background. Lastly the nearest rugged rocks with colourful, intricate details were just irresistible and asking to be painted.

 I started by stretching the large sheet of paper (68 x 92cm) onto a drawing board. This was done to keep it flat regardless of the amount of water used during the painting process.


Then I sketched the scene using a water soluble pencil.


 With a toothbrush I flicked tiny specs of masking fluid to create the impression of sea spray. Then I painted the dark blue and green sea. With a white watercolour pencil I scraped tiny shavings onto the wet background then smudged the dots with a fine fan brush.


The specs made by using masking fluid are whiter and sharper than the ones made with the white pencil. This creates depth in the painting.


I then painted the smooth dark rocks where the waves were breaking and also the green wash further in. I had some difficulty making the rocks really look wet.


Now it was time to add the warm colours of the sun drenched granite and sandstone.  This was a time consuming process, one small area at a time. I am looking forward to painting the reflections in the water of the rock pool
, and of course all the details of the foreground.
More about that in my next post.

Live now!

The cover of my video
available at Pulsar Productions

My video "Forest Streams with acrylics" is live! click  here


Just click on the video to get access to the whole full length, hour long film in HD.

My videos are published worldwide by  Pulsar Productions Australia

They were very pleased with the result and wrote:
"Fabulous, superb paintings, very educational and excellent production values. Well done for braving facing the camera, I know you're not keen, but that picture in picture of you speaking to the camera helps give a connection to you."
Although it took me a ridiculous amount of time during a ten month period I am also pleased with the result. In most cases a film like this is produced by a whole team of experts which you normally see in the rolling credits at the end of a film. 

 Apart from the music this was entirely a one person show. While I painted I filmed and recorded everything using a DSLR camera on a tripod. Sometimes I even used a Gopro camera, or iphone, ipad or a DJI mavic pro drone which I  sent up for footage from an altitude of 65 meters.

 One of the difficult scenes was especially time consuming. I painted a leaf flying over the stream and wanted to capture live footage of the leaf

flying. I tried standing next to the stream while throwing a leaf in the air and letting it sail downwards while filming with the camera on a tripod. The slightest gust of wind blew the leaf away before I could catch it in the viewfinder. Over and over I tried until I finally caught enough footage to render it in slow motion.


Me talking in front of the teleprompter


Another difficult scene was when I wanted look straight at the camera and talk frankly and sincerely about my trials and errors. (Even though I have been an artist for over 50 years I can still make mistakes.) I used a home made teleprompter for this which I described in my last post.


Starting the recording at the right moment


I then worked with the very time consuming process of editing the video. This was especially difficult as I was using many tracks in the editing program Premiere Pro: The tracks consisted of superimposed pictures in pictures, original video footage, and two tracks each for the stereo audio recordings : ambient sound, narrative, sound effects and music.


Editing the video

The video is available for download or streaming on vimeo


Tuesday

Tele prompter


 I am hopeless at remembering what to say if I need to talk in front of a camera. In my latest video about painting techniques I wanted to talk to the viewers about my inspiration. So I decided I needed a tele-prompter like the ones TV news anchors use.

After searching for one on the net I found a very cheap solution. I downloaded an app from Cowlin software called Teleprompter Pro Lite. This can transform your text into white script on a dark background. Then you can mirror the text and get it to roll downwards at a speed that suits your reading speed. 
Cutting a hole for the camera lens.


The assembled parts with ipad and photo frame
Then all that's needed is:

* A tablet or ipad for the text,

* A black cardboard box with a hole in the  back to fit your camera lens.

* A photo frame with glass, size A4.

* A bit of string.

* Your camera


The glass is hung at 45 degrees in front of the camera so that the text on the ipad is reflected on the surface. You can then see the reflected text but the camera only sees you.
It took a while to rig up and more time to practise reading like this. The first time my eyes could be seen moving along the rows of text but by moving the teleprompter further away and enlarging the text it looked more natural.
I read that teleprompter reading technique is an art that isn’t that easy. I now closely study the eyes of news anchors and have great respect for them.


Monday

Experiment


A couple of years ago I took part in an international watercolour festival in Fabriano Italy. Apart from exhibitions, lectures and meetings there were a number of interesting workshops. Among them was a workshop lead by the renowned french artist Didier Brot in which he demonstrated the use of synthetic paper. In the US this paper is called Yupo and in France Lana Vanguard. He started the workshop by telling the participants to forget everything they had ever learnt about watercolour! This was, to say the least, a new approach for me. 

Basically the technique involves painting the dark colours first as a background and then lifting areas off selectively, where needed, with a damp brush. Then its possible to gradually build up the subject by adding colours of different strengths. The colours stay on the surface of the paper and easily run into each other even after drying time. This took some getting used to.

Here is a painting I have been working on for the last 10 days. I wanted to depict the atmosphere of magic and mystery in a Swedish forest. It was a great challenge to render the details I wanted and I had to paint them several times before getting them right.


Saturday

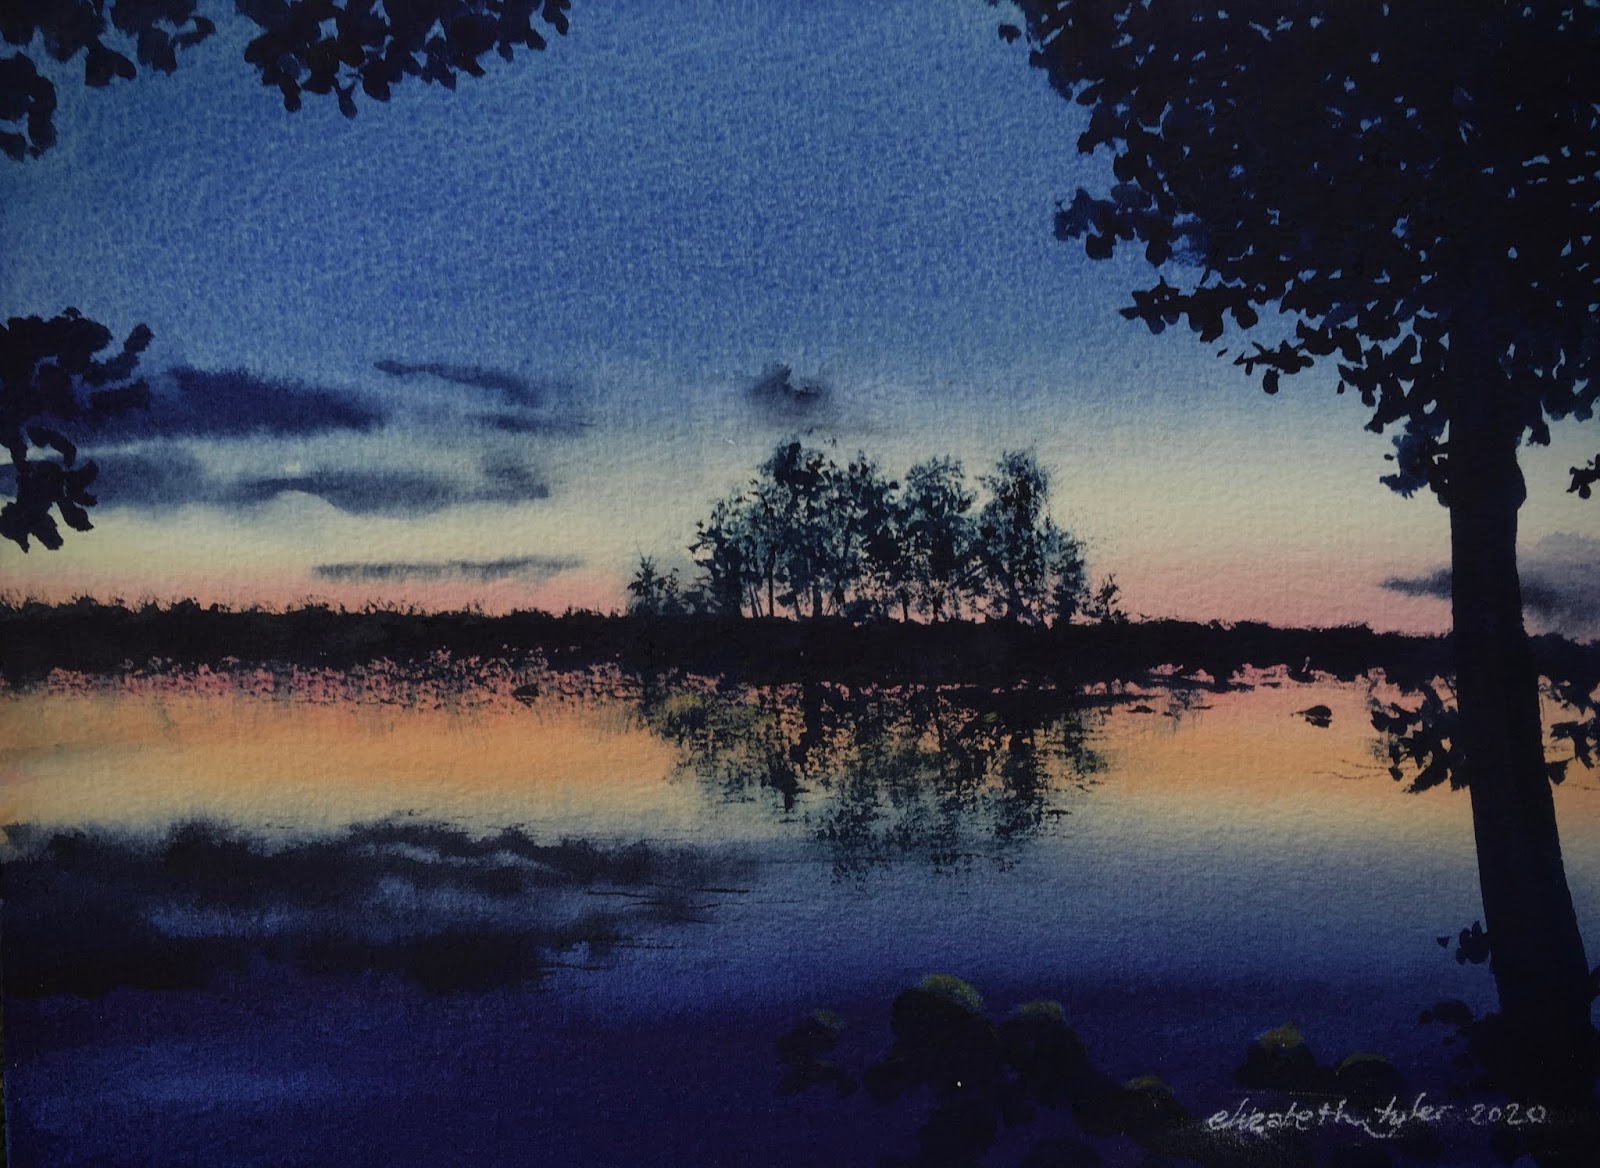
Midsummer Night

Midsummer Night                                      Watercolour 23 x 31 cm                               Elizabeth Tyler 2020
This is the view I had over the Fegen Lake in Sweden on Midsummer Night. I was fascinated by the intensity of the colours in the sky even though it wasn’t quite the midnight sun.
The colours I used for the sky were French Ultramarine and Quinacridone Magenta.
The water was painted in Quinocridone Magenta, Orange and Indanthrone Blue. All were tube colours by Daniel Smith. The trees and dark clouds were finally added with Paynes Grey.
The Paper I use is Arches rough, 300 G/M2 in this case a small block sized 23x31 which is easy to travel with.

Tuesday

Finding new inspiration in Corona times.

In case anyone is wondering what I’m up to
in these Corona times I thought it was time for an update.
I had planned on returning to the boat with my partner in February. Aquarella is standing on dry land at the Basimakopolou shipyard in Kilada Greece where I know she is safe, which is a consolation. However when all the borders closed I knew it would be impossible to get back for quite some time. As my partner and I are in the risk group ( we are both 74) it is especially important to keep to the rules of social distancing. We stayed in the house for nearly three months and even though we could enjoy the fresh air in the garden we longed to get out and see something else. Being privileged of having a camper van this was an opportunity to get out and about without getting near other people. We can still not cross any borders and we are not allowed to travel more than two hours from our home district but even so its possible to see and experience some of Sweden’s unique and noteworthy nature from our own secure bubble of the van.
In Sweden there is an ancient right going back at least 500 years called Allemansrätt. ( Everyones right) This applies even today.
This means in brief the following:

You are allowed to access any land, except private residences, or the immediate vicinity (70 meters) of a dwelling house and cultivated land.
You can put up a tent.
You are allowed to collect flowers, mushrooms and berries.
Driving on private roads is allowed unless there’s a sign saying otherwise.
Swimming in lakes is allowed.
You can access any beach as long as you stay away from private residences.
You are allowed to catch fish in the five big lakes and along the entire coastline.

Source: The Swedish Environmental Protection Agency (EPA).

So instead of another solosail on my boat in Greece I am on a road trip in Sweden with my partner.
One overnight stay was on a tiny peninsular with just enough space for the van. We were surrounded by the water of a lake on three sides and while we listened to the swaying branches of overhanging trees, the van was even slightly rocking in the wind, it was ALMOST like being on board my boat.The sound of a nearby passing train was no worse than listening to a passing cruise ship.
As often before I am producing a video about my painting techniques. This time its been necessary to choose a smaller body of water as subject matter. Instead of the crashing waves of the open sea I have been inspired by the trickling water of a forest stream. The acrylic painting in progress will be available soon as streaming video, more about this later.


Saturday

New video

Every year at Easter for the last 23 years I have opened my home for the public for 10 days during the open studio event called Konstrundan here in Sweden.
                                       The video with a virtual tour of the house and studio.
                                                       https://youtu.be/KgxlFKvdHrs

What was before my dining room is now exhibition space
The lounge where each painting has its own spotlight.
Towards the previous open plan kitchen now with a sliding partition
 I had never prepared for the event as much as I had this year. The whole house was renovated and is much lighter than before with new flooring, white walls and each painting with its own spotlight. I had decided to open the whole house for the public this time, not only with exhibition space for paintings but also the studio itself upstairs including a small exhibition with my photographic art.
Unfortunately, owing to the Corona pandemi, the event was cancelled this year.
So to enable everyone to see a little of my exhibition/studio anyway I have produced this short video as a virtual tour of the house.
I hope you enjoy it.
You can also visit my website at
www.elizabethtyler.com
or 
Konstrundan